CentOS 系统 Python 环境搭建
密钥登陆 CentOS
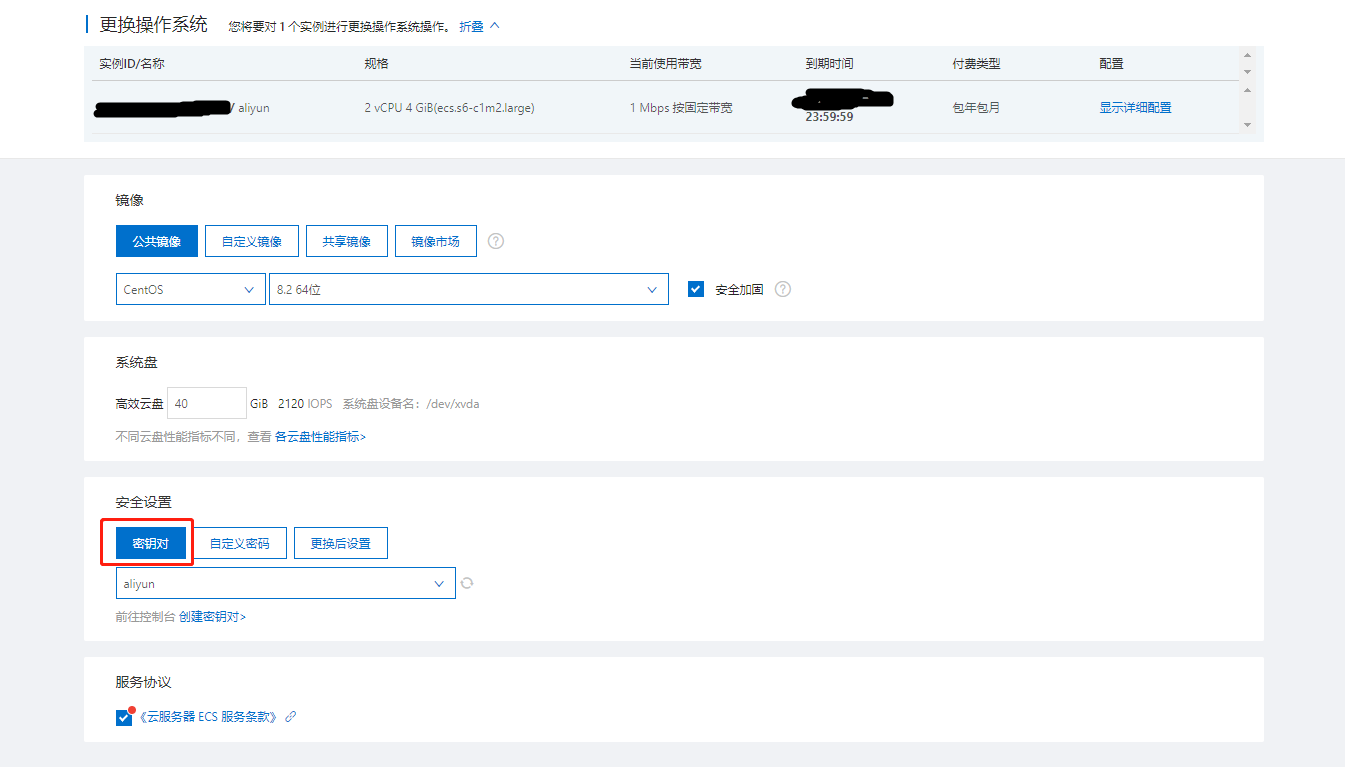
安装系统时,指定使用密钥登陆,可以有效防止服务器被暴力破解。

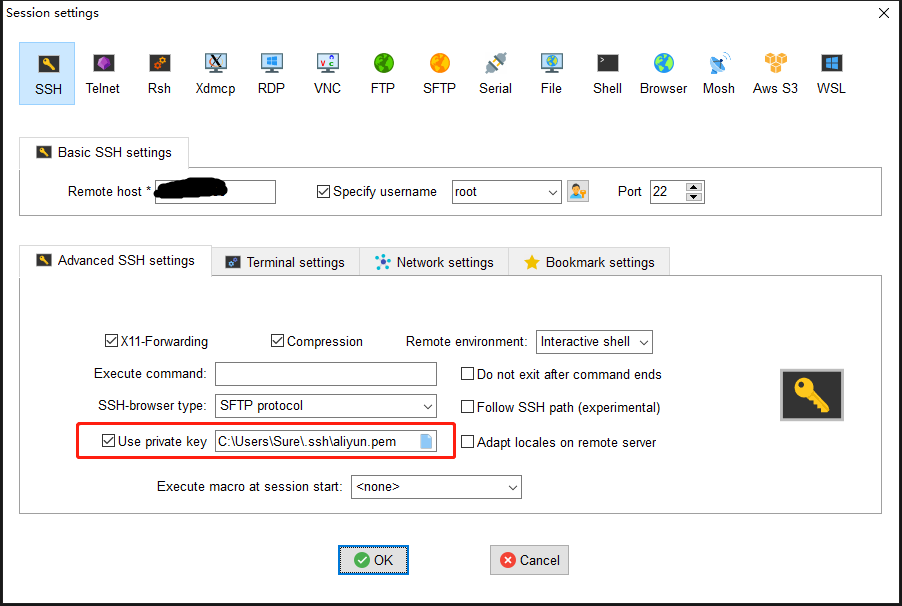
可以使用 MobaXterm 登陆中指定密钥,实现密钥登陆:

也可以本地生成密钥对,然后将公钥存放至 ~/.ssh/authorized_keys 文件中。
或者使用命令,将密钥 id 放到服务器上:
ssh-copy-id 192.168.11.11创建管理员用户并禁止 root 登录
对于 Linux 来说,root 用户的权限过高且名称确定,如果被黑客利用后果不堪设想。
添加新用户:
useradd shuo修改新用户密码(如果是外网服务器,安全起见,需设置复杂一些才好):
passwd shuo给新用户 sudo 权限:
打开 sudo 的配置文件
visudo也可以使用 vim 直接修改
/etc/sudoers文件。使用visudo命令修改会有语法检测,更专业。找到如下配置行,添加你允许使用 sudo 的用户名字
## Allow root to run any commands anywhere
root    ALL=(ALL)       ALL
shuo    ALL=(ALL)       ALL
使用 sudo 命令,在你敲的命令前,加上 sudo 即可:
sudo ls /root
禁止 root 登陆,允许密码登陆:
vim /etc/ssh/sshd_config 把 PermitRootLogin yes 改为 PermitRootLogin no, 把 PasswordAuthentication no 改成 PasswordAuthentication yes:

重启 ssh 服务:
service sshd restart更换 ssh 端口
打开 ssh 服务的配置文件:
vim /etc/ssh/sshd_config找到 #Port 22,将它取消注释,将 22 修改为需要的端口;
重启 ssh 服务:
service sshd restart重启服务不会断开已有链接,下次连接时生效配置。
有些云服务供应商需要去安全组配置打开所需端口:

安装 Python 虚拟环境
阿里云的 CentOS 系统中已经自带了 Python3.6.8 和 pip,无需自己安装,而且已经默认将 pip 源设置为阿里云。
通过下面几条命令安装虚拟环境(virtualenvwrapper 依赖前三个包):
sudo pip3 install wheel
sudo pip3 install pbr
sudo pip3 install virtualenv
sudo pip3 install virtualenvwrapper
设置 Linux 的环境变量,确保计每次开机启动时加载 virtualenvwrapper。
打开并编辑 ~/.bashrc 文件:
vim ~/.bashrc在文件末尾添加下面几行代码,注意修改 Python 解释器和 virtualenvwrapper 的地址为自己的 Python 安装位置,修改好后保存并退出:
export WORKON_HOME=~/PyEnvs    # 设置 virtualenv 的统一管理目录,可按需修改
export VIRTUALENVWRAPPER_PYTHON=/usr/bin/python3    # 指定 Python 解释器
source /usr/local/bin/virtualenvwrapper.sh    # 执行 virtualenvwrapper 安装脚本
读取 ~/.bashrc 文件,使其生效:
source ~/.bashrc执行效果像下面这样,说明运行成功。不出意外的话,完成此步即可使用 virtalenvwrapper。
[root@localhost ~]# source ~/.bashrc
virtualenvwrapper.user_scripts creating /root/Envs/premkproject
virtualenvwrapper.user_scripts creating /root/Envs/postmkproject
virtualenvwrapper.user_scripts creating /root/Envs/initialize
virtualenvwrapper.user_scripts creating /root/Envs/premkvirtualenv
virtualenvwrapper.user_scripts creating /root/Envs/postmkvirtualenv
virtualenvwrapper.user_scripts creating /root/Envs/prermvirtualenv
virtualenvwrapper.user_scripts creating /root/Envs/postrmvirtualenv
virtualenvwrapper.user_scripts creating /root/Envs/predeactivate
virtualenvwrapper.user_scripts creating /root/Envs/postdeactivate
virtualenvwrapper.user_scripts creating /root/Envs/preactivate
virtualenvwrapper.user_scripts creating /root/Envs/postactivate
virtualenvwrapper.user_scripts creating /root/Envs/get_env_details
[root@localhost ~]#
virtualenvwrapper 的基本使用操作命令:
# 创建一个虚拟环境:
mkvirtualenv my_django111    # 这会在 ~/Envs 中创建 my_django111 文件夹

# 在虚拟环境上工作,激活虚拟环境my_django111
workon my_django111

# 再创建一个新的虚拟环境
mkvirtualenv my_django2

# virtualenvwrapper 提供环境名字的tab补全功能。
# 当有很多环境, 并且很难记住它们的名字时,这就显得很有用。

# workon还可以任意停止你当前的环境,可以在多个虚拟环境中来回切换
workon django1.11
workon django2

# 也可以手动停止虚拟环境
deactivate

# 删除虚拟环境,需要先退出虚拟环境
rmvirtualenv my_django111
其他常用命令:
# 列举所有的环境
lsvirtualenv
# 导航到当前激活的虚拟环境的目录中,比如说这样就能够浏览它的 site-packages
cdvirtualenv
# 和上面的类似,但是是直接进入到 site-packages 目录中
cdsitepackages
# 显示 site-packages 目录中的内容
lssitepackages

# 完整官网介绍:https://virtualenvwrapper.readthedocs.io/en/latest/command_ref.html
安装 git
直接使用 yum 安装:
sudo yum install git安装 Docker
首先,删除所有已经安装了的 docker:
sudo yum remove docker \
                docker-client \
                docker-client-latest \
                docker-common \
                docker-latest \
                docker-latest-logrotate \
                docker-logrotate \
                docker-engine
配置 docker 的 yum 仓库:
sudo yum update
sudo yum install -y yum-utils
sudo yum-config-manager \
    --add-repo \
    https://download.docker.com/linux/centos/docker-ce.repo
sudo yum update
安装 docker:
sudo yum install docker-ce docker-ce-cli containerd.io启动/停止/重启 docker 服务:
sudo systemctl start docker
sudo systemctl stop docker
sudo systemctl restart docker
查看 docker 是否安装成功:
sudo docker run hello-world此时 Docker 已经安装完毕。不过每次使用 Docker 都需要 sudo 权限才行,首次使用还要输入密码,很繁琐。可通过将当前用户添加到名为 docker 的用户组的方式,免除每次使用 docker 时都要敲 sudo 的限制:
sudo groupadd docker    # 创建一个 docker 用户组
sudo usermod -aG docker $USER    # 添加当前用户到 docker 用户组
安装 Nginx
直接使用 yum 安装:
sudo yum install nginx也可以通过编译安装,参见: Nginx 快速入门
编辑 nginx 配置文件,隐藏 nginx 版本号的显示,在 http 标签中加上如下一行配置即可:
http {
    ...
    server_tokens off;
    ...
}
配置 Java jdk
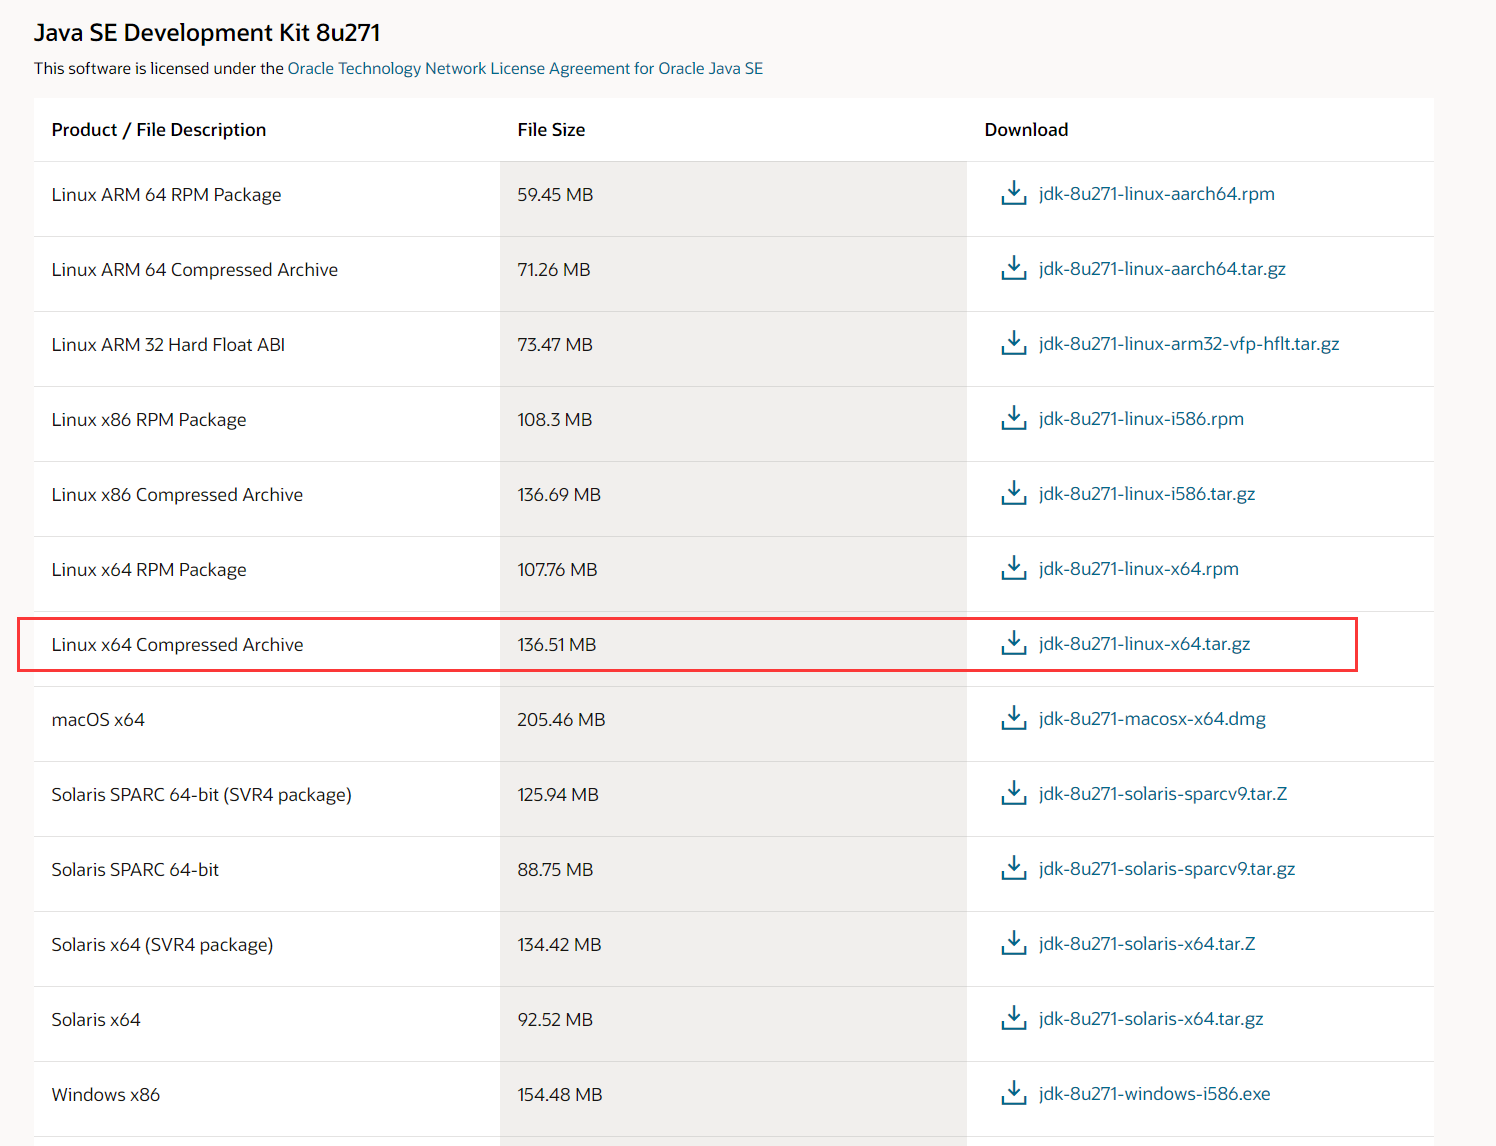
官网下载 Java 安装包:

将安装包上传至服务器,解压
tar -zxvf jdk-8u271-linux-x64.tar.gz将压缩包移动到合适的位置:
sudo mv jdk1.8.0_271/ /opt/jdk配置 JAVA_HOME 等参数与 ~/.bashrc 文件中:
JAVA_HOME=/opt/jdk
JRE_HOME=$JAVA_HOME/jre
CLASSPATH=.:$JAVA_HOME/lib/dt.jar:$JAVA_HOME/lib/tools.jar
PATH=$PATH:$JAVA_HOME/bin
export PATH JAVA_HOME JRE_HOME CLASSPATH
安装 npm
由于 node.js 的版本一直处于不断更新中,所以我们需要一个版本管理器来更好的使用 node.js。
nvm 是一个开源的 node 版本管理器,通过它,你可以下载任意版本的 node.js,还可以在不同版本之间切换使用。
注意:安装 nvm 之前,要确保当前机子中不存在任何版本的 node,如果有,则卸载掉。
github:https://github.com/creationix/nvm
安装命令:
sudo apt-get update
sudo apt install curl
curl -o- https://raw.githubusercontent.com/creationix/nvm/v0.34.0/install.sh | bash
source ~/.bashrc
安装 node
使用 nvm 的相关命令安装 node。
# 查看官方提供的可安装 node 版本
nvm ls-remote

# 安装执行版本的 node,例如:nvm install v10.15.2
nvm install <version>

# 卸载 node 版本,例如:nvm uninstall v10.15.2
nvm uninstall <version>

# 查看已安装的 node 列表
nvm ls

# 切换 node 版本,例如:nvm use v10.15.2
nvm use <version>

# 设置默认版本,如果没有设置,则开机时默认 node 是没有启动的。
nvm alias default v10.15.2

# 查看当前使用的版本
nvm current
安装几个常用的 LTS 版本
nvm install v10.15.2
nvm alias default v10.15.2
npm
npm(node package manager)是 nodejs 的包管理器,用于 node 插件管理(包括安装、卸载、管理依赖等)。安装了 node 以后,就自动安装了 npm(不一定是最新版本)。
npm --version默认情况下,npm 安装插件是从国外服务器下载,受网络影响大,可能出现网络异常。
通过淘宝镜像加速 npm
# 打印默认的 registry 地址
npm config -g get registry

# 设置淘宝镜像
npm config -g set registry https://registry.npm.taobao.org