iTerm2 + oh-my-zsh + agnoster 配置
Mac 系统自带的 Terminal 偶尔会崩溃一下,用起来很不舒服。查了些资料,发现很多人都推荐使用 iTerm2,配合 oh-my-zsh 和 agnoster 主题使用。尝试了一下,效果确实还可以。
iTerm2
iTerm2 是对 Mac 自带的 Terminal 的扩展。不过我使用 iTerm2 主要是受够了 Terminal 动不动就要崩溃一下的问题。
iTerm2 安装很容易,直接到 官网 下载安装包安装即可。
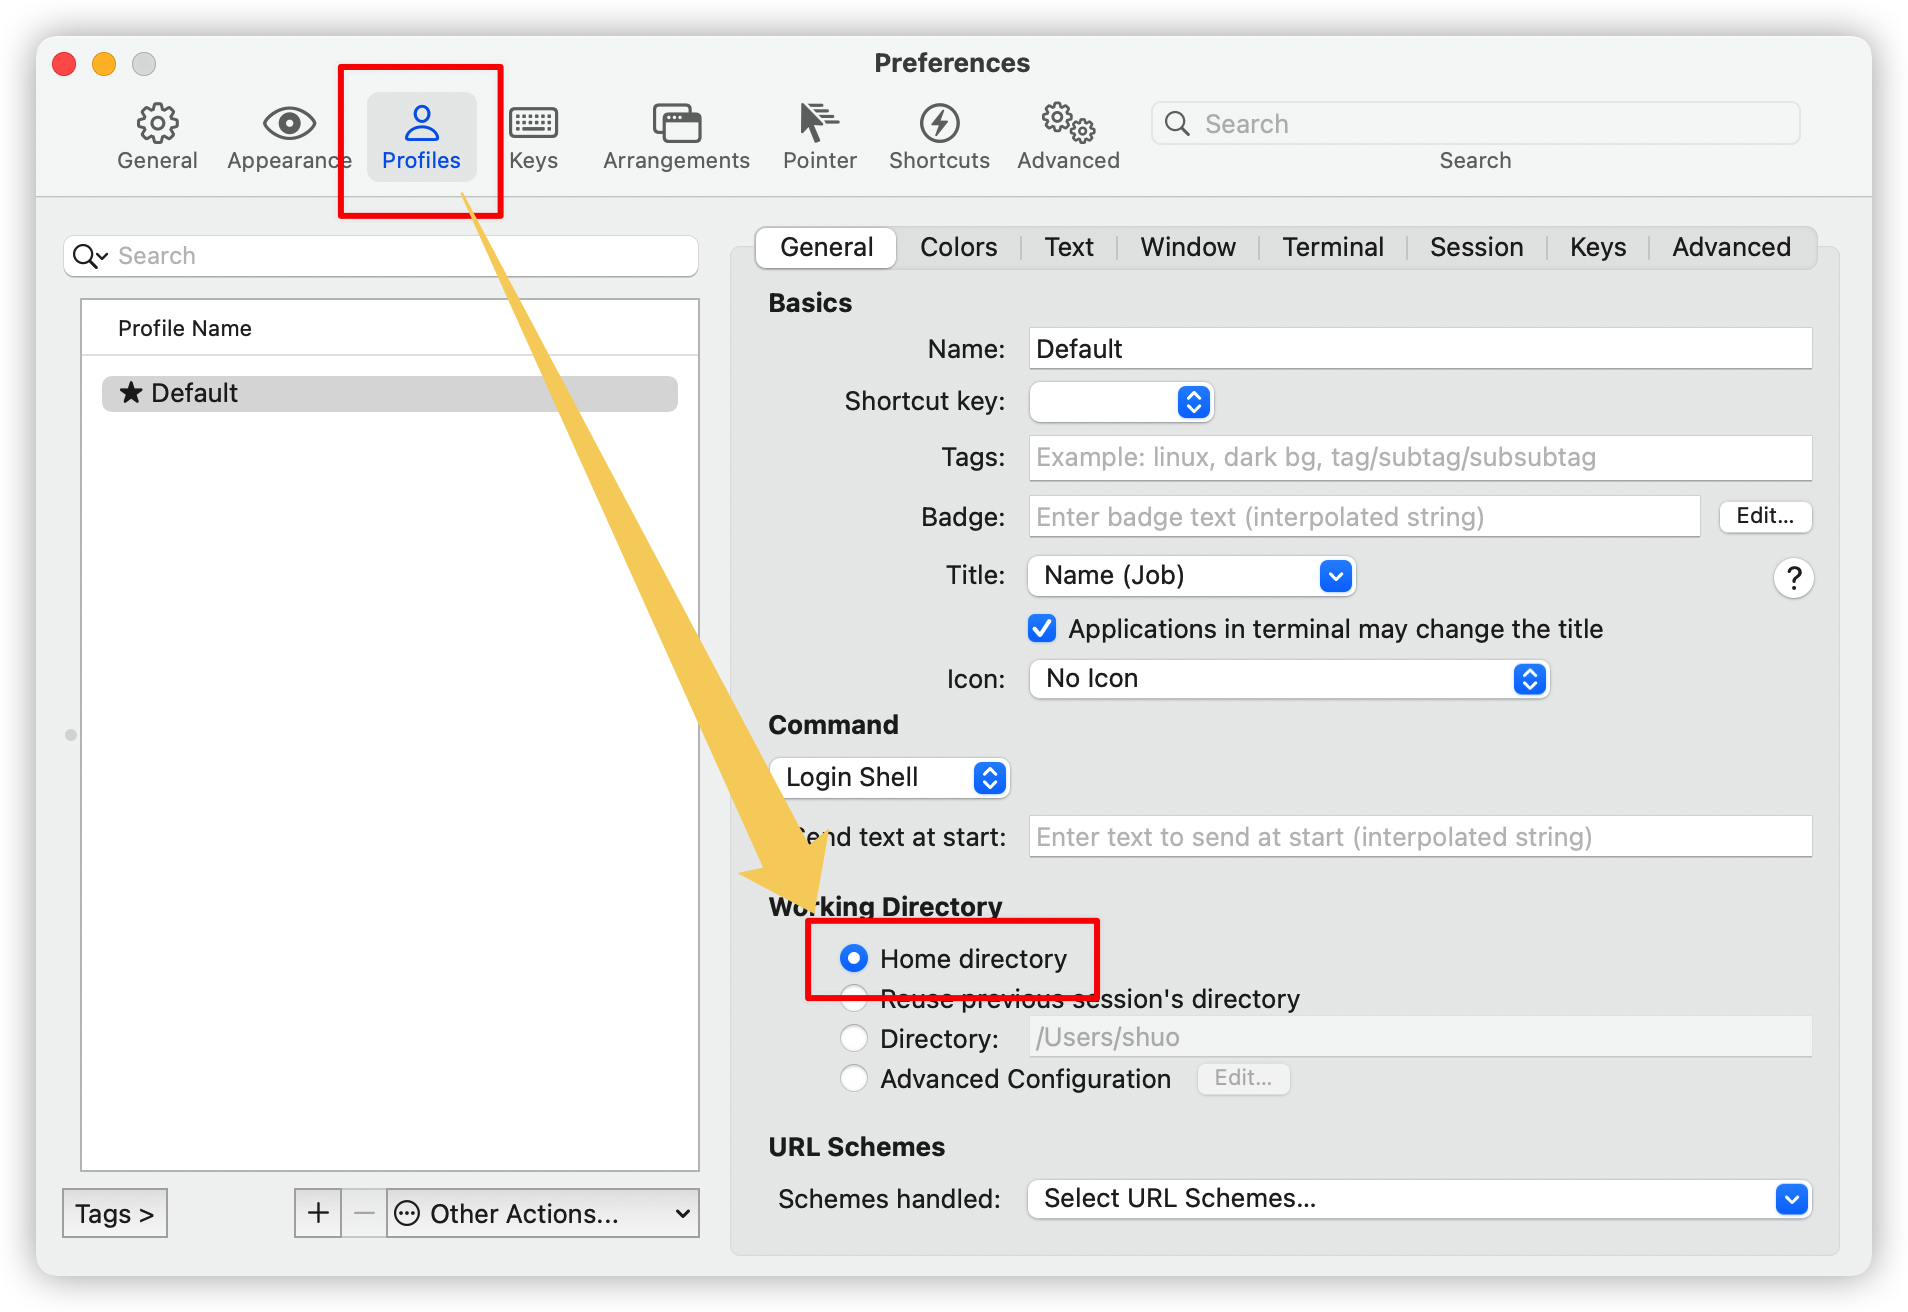
默认进入的路径可以在 Preferences 的 Profiles 选项卡中设置:
iTerm Color Schemes
iTerm2 自带的配色有限,iTerm Color Schemes 提供了大量的配色方案。
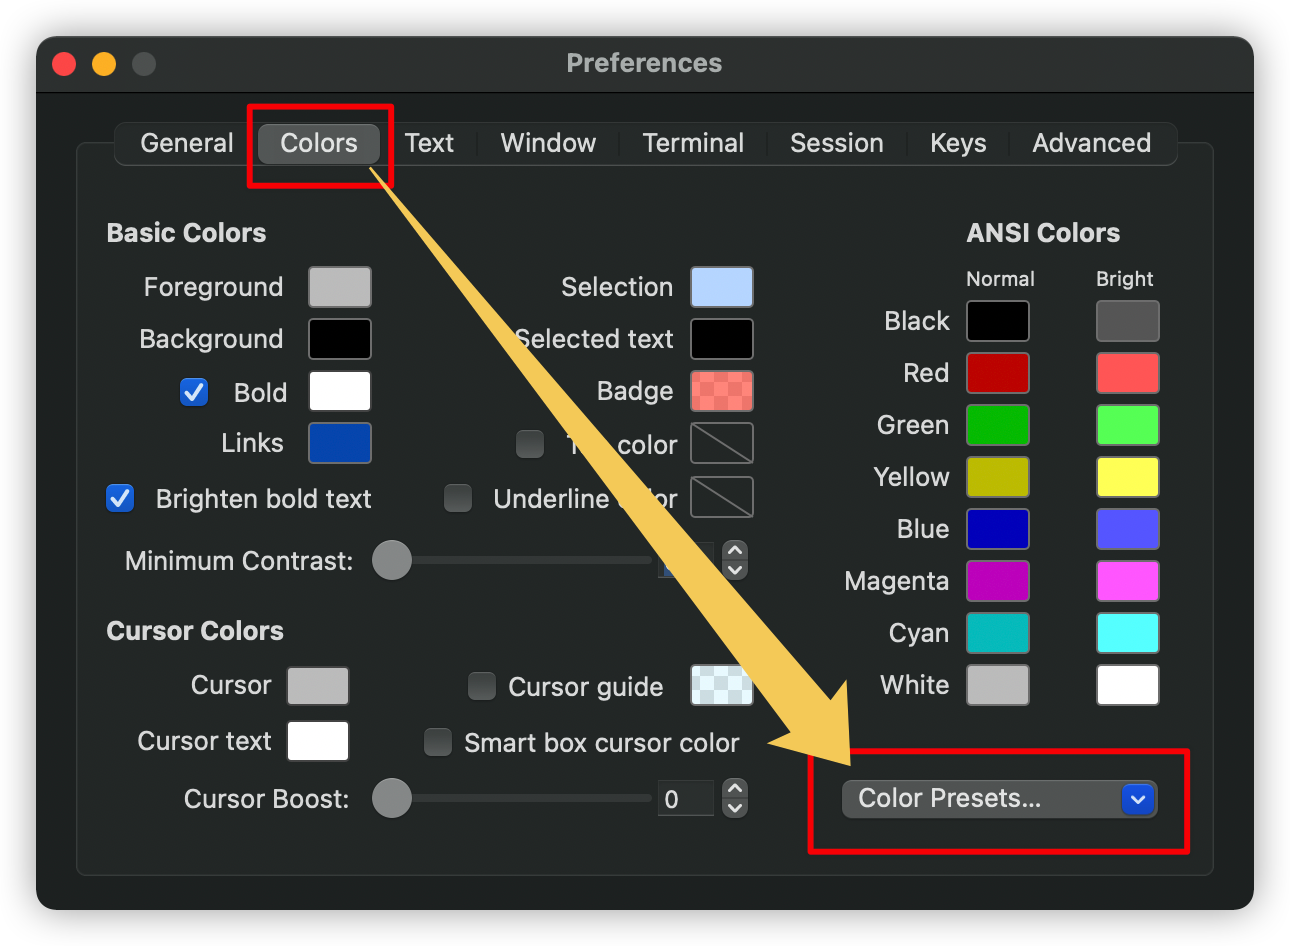
将 iTerm Color Schemes 代码下载好之后,在 iTerms 中键入 ⌘+i,调出配置窗口。然后进入 Colors 选项卡,点击 Color Presets 选择 Import:
然后进入下载好的 iTerm Color Schemes 代码文件夹的 schemes 目录,找到你想要的 ``.itermcolors导入即可。我比较喜欢的是Gruvbox Dark` 配色。
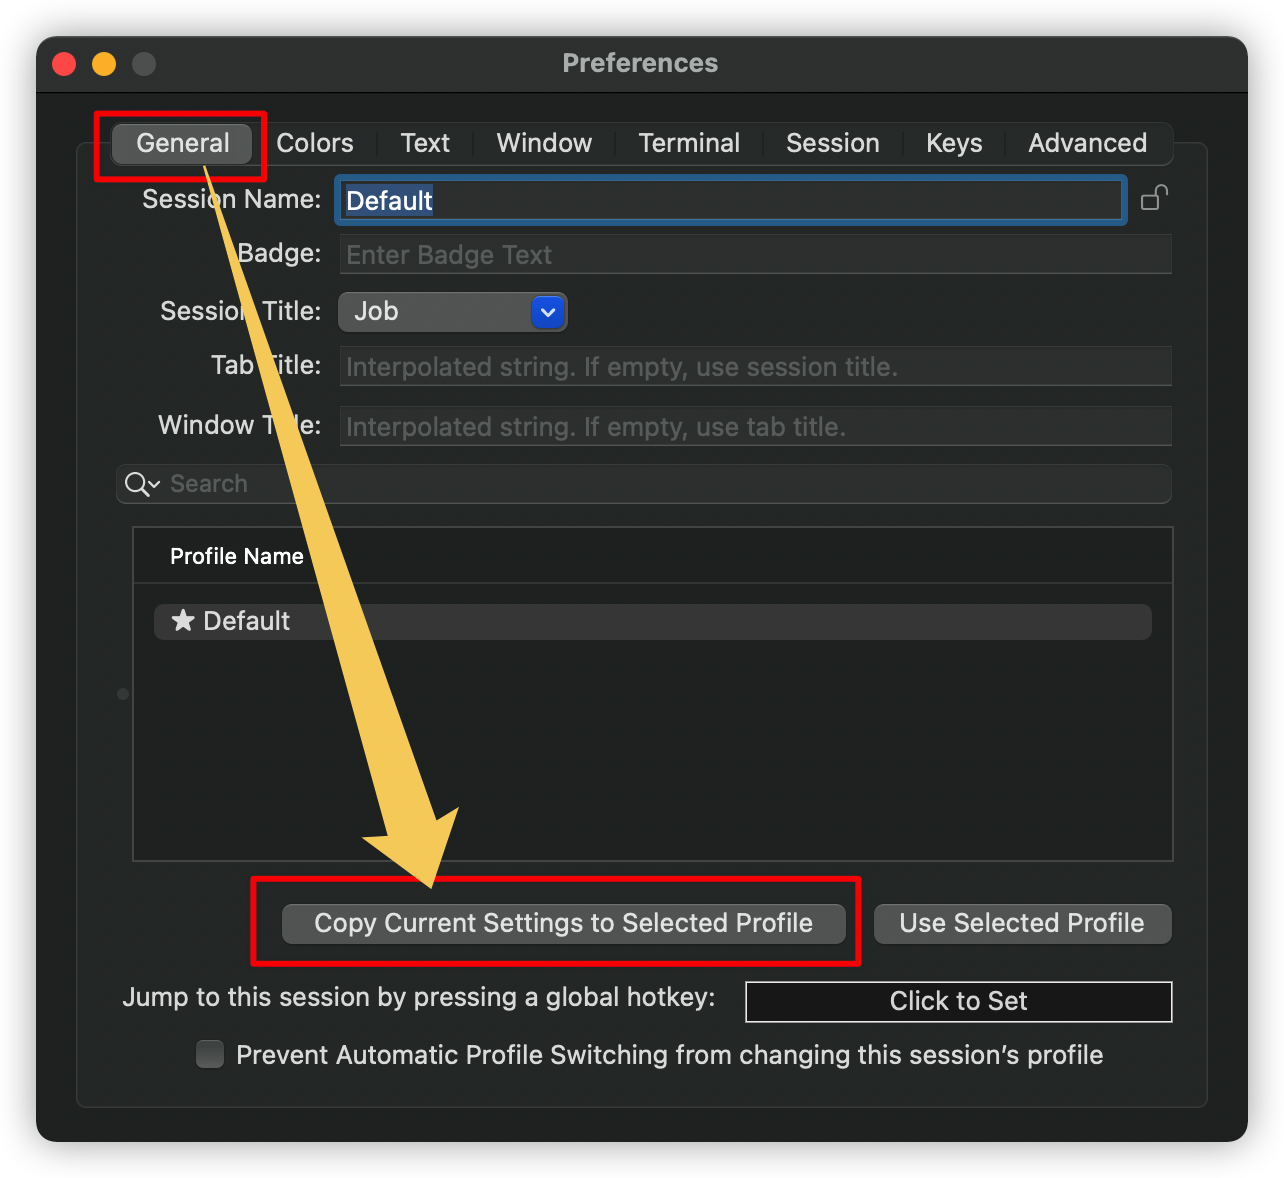
选好配色之后只会在当前活动的 iTerm2 窗口生效,如果要全局生效,需要在配置窗口的 Gernal 选项卡中点击 Copy Current Settings to Selected Profile 按钮:
oh-my-zsh
oh-my-zsh 为 zsh 提供很多的插件和模板,使用起来会更舒服。
oh-my-zsh 的 官方仓库 有更详细的介绍。
官网给出了三种安装方法,如果因为网络原因安装不成功,可以下载 git 仓库,然后手动执行 tools/install.sh 安装。
| 方法 | 命令 |
|---|---|
| curl | sh -c "$(curl -fsSL https://raw.githubusercontent.com/ohmyzsh/ohmyzsh/master/tools/install.sh)" |
| wget | sh -c "$(wget -O- https://raw.githubusercontent.com/ohmyzsh/ohmyzsh/master/tools/install.sh)" |
| fetch | sh -c "$(fetch -o - https://raw.githubusercontent.com/ohmyzsh/ohmyzsh/master/tools/install.sh)" |
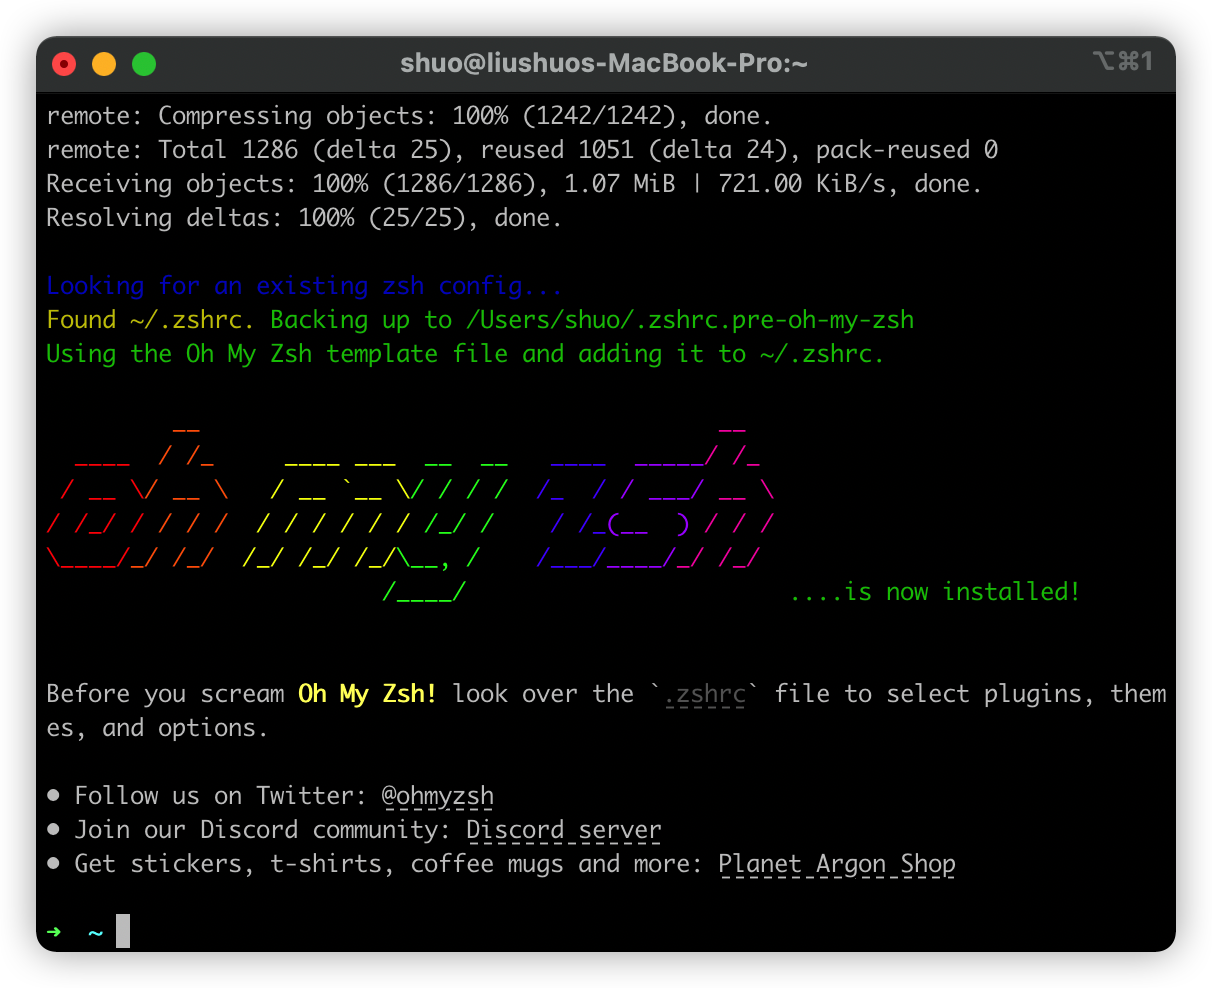
安装成功后,终端就变得更多彩了:
agnoster
oh-my-zsh 默认的主题是 robbyrussell,我们可以替换成各种自己喜欢的主题。可以在 官方截图 预览这些主题,然后找到自己喜欢的设置。
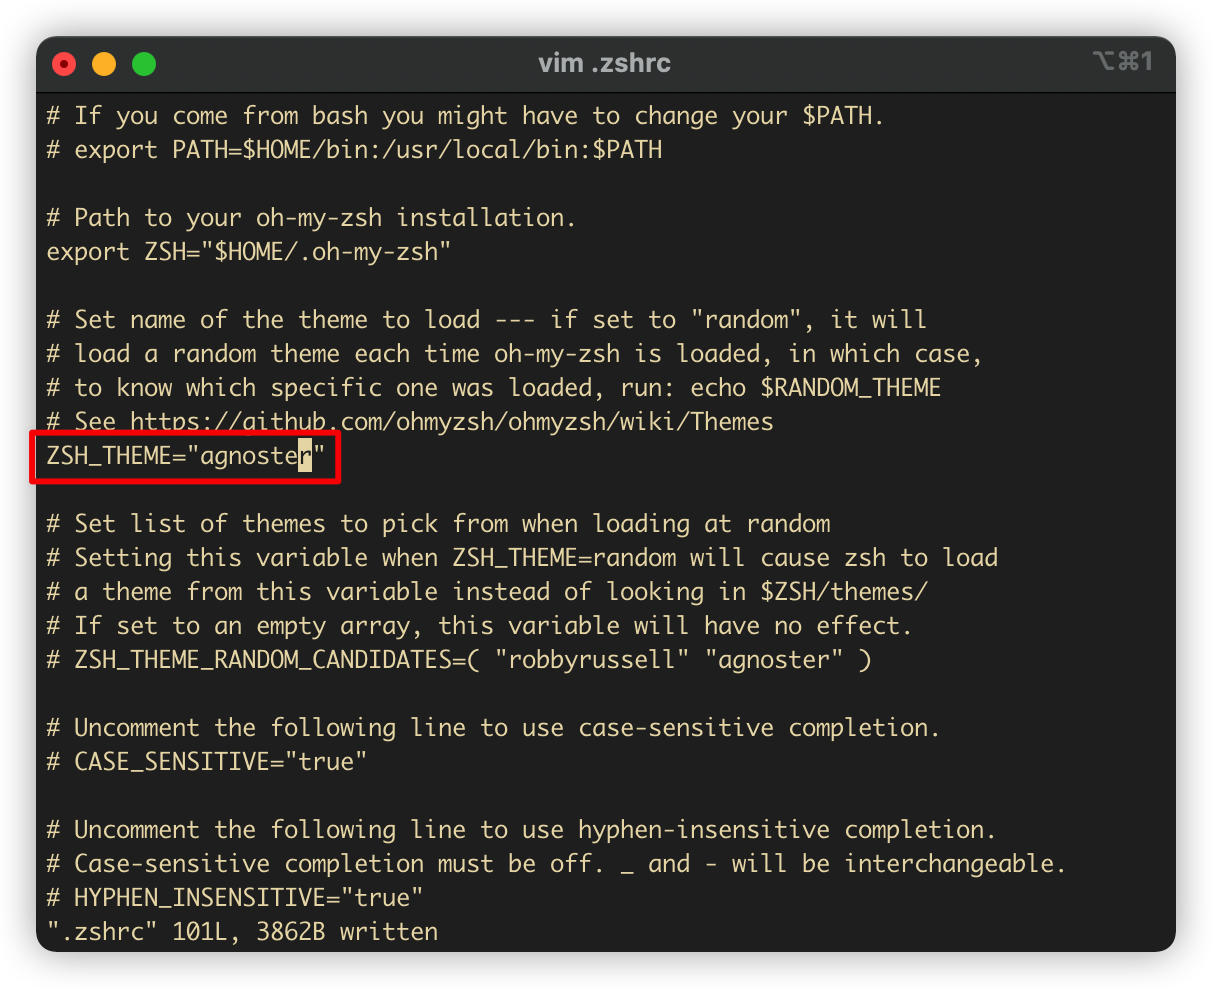
比如我想把主题设成 agnoster,只需修改 ~/.zshrc 中的配置即可:
执行 .zshrc 生效配置:
source ~/.zshrc然后就遇到了问题,乱码了:
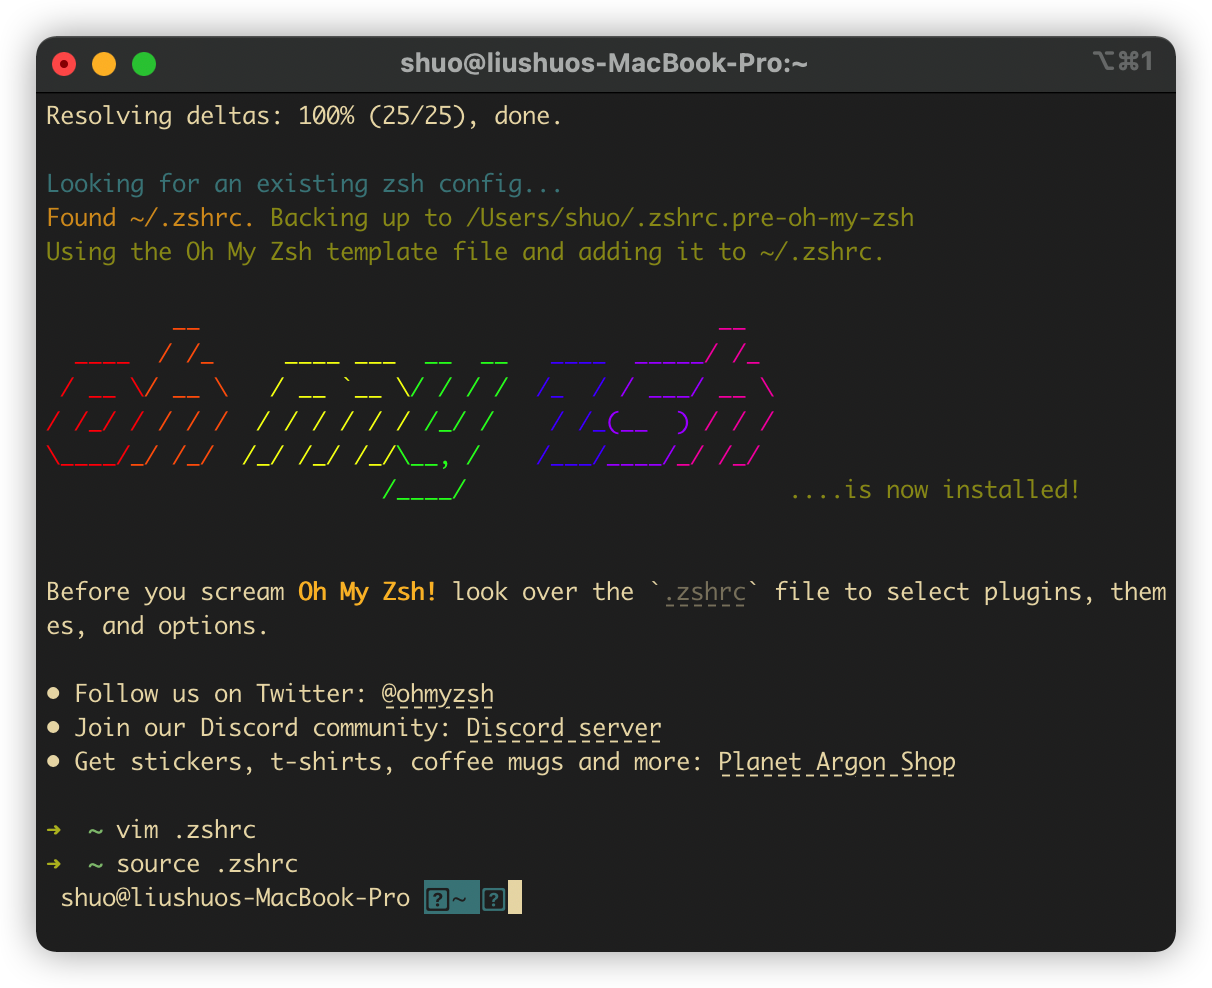
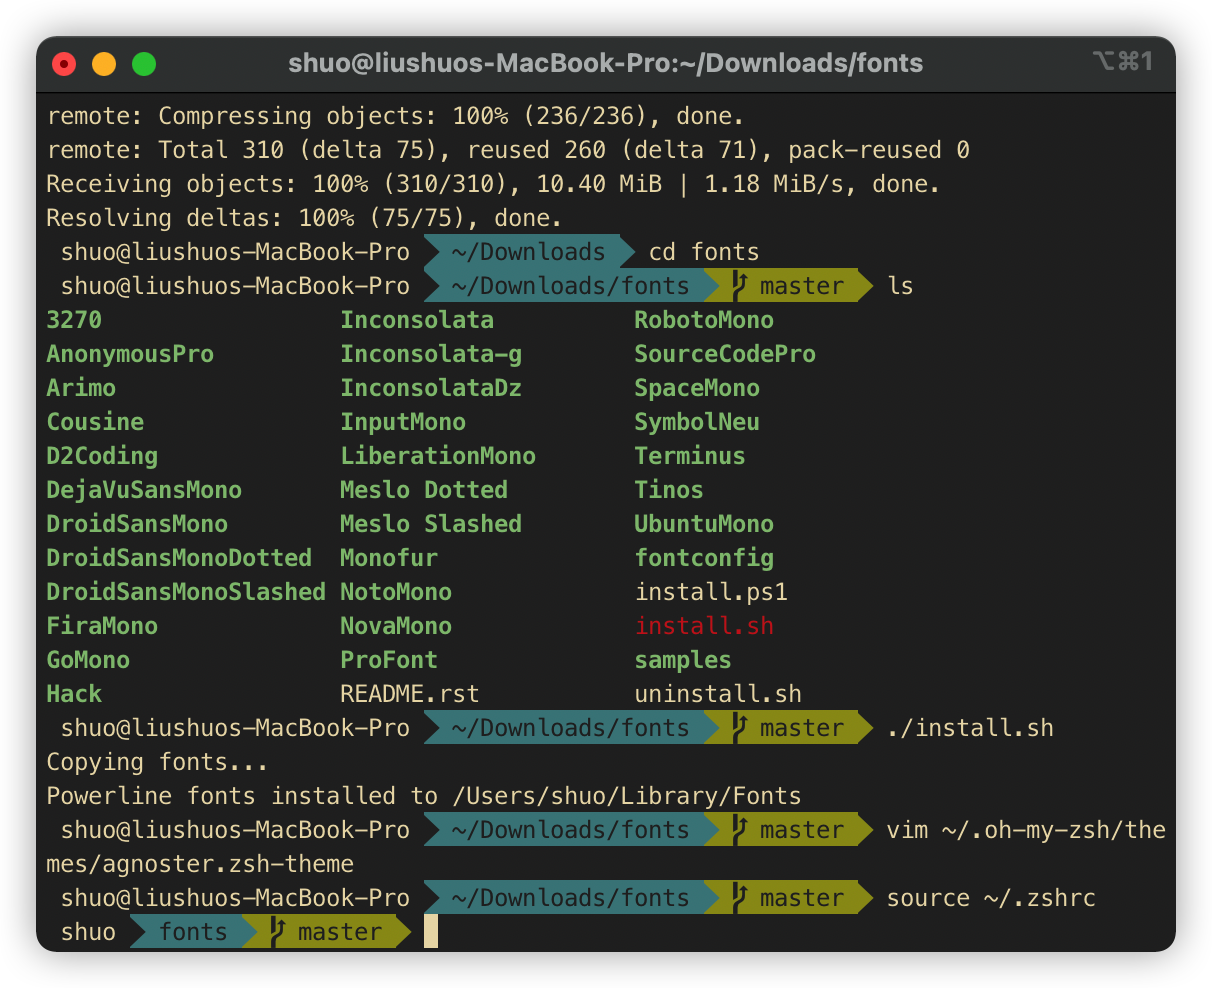
这是因为模板中使用了非 ascii 编码的文字,而终端的字体不能将其识别出来。那就安装一个支持非 ascii 编码的字体呗。我用的是 Powerline fonts,按照官网的方法一步一步执行即可:
# clone
git clone https://github.com/powerline/fonts.git --depth=1
# install
cd fonts
./install.sh
# clean-up a bit
cd ..
rm -rf fonts
安装字体为 Meslo LG L DZ for Powerline,L、M、S 分别对应字体的 大、 中、 小:
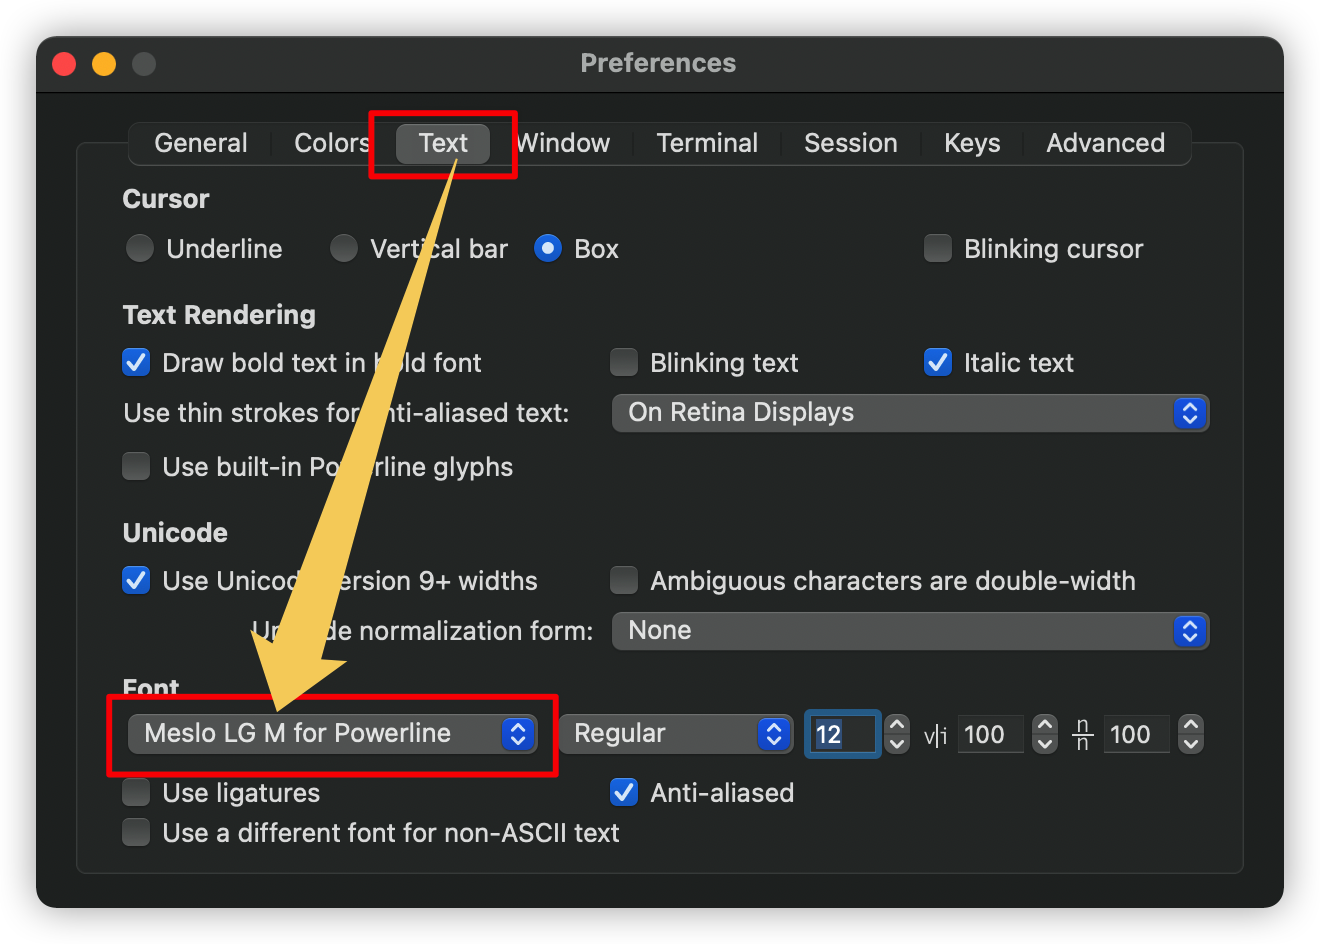
同样需要在 General 选项卡中点击 Copy Current Settings to Selected Profile 按钮全局生效:

现在已经基本正常显示了,美中不足的是主机名和路径过长,看起来不是很舒服:
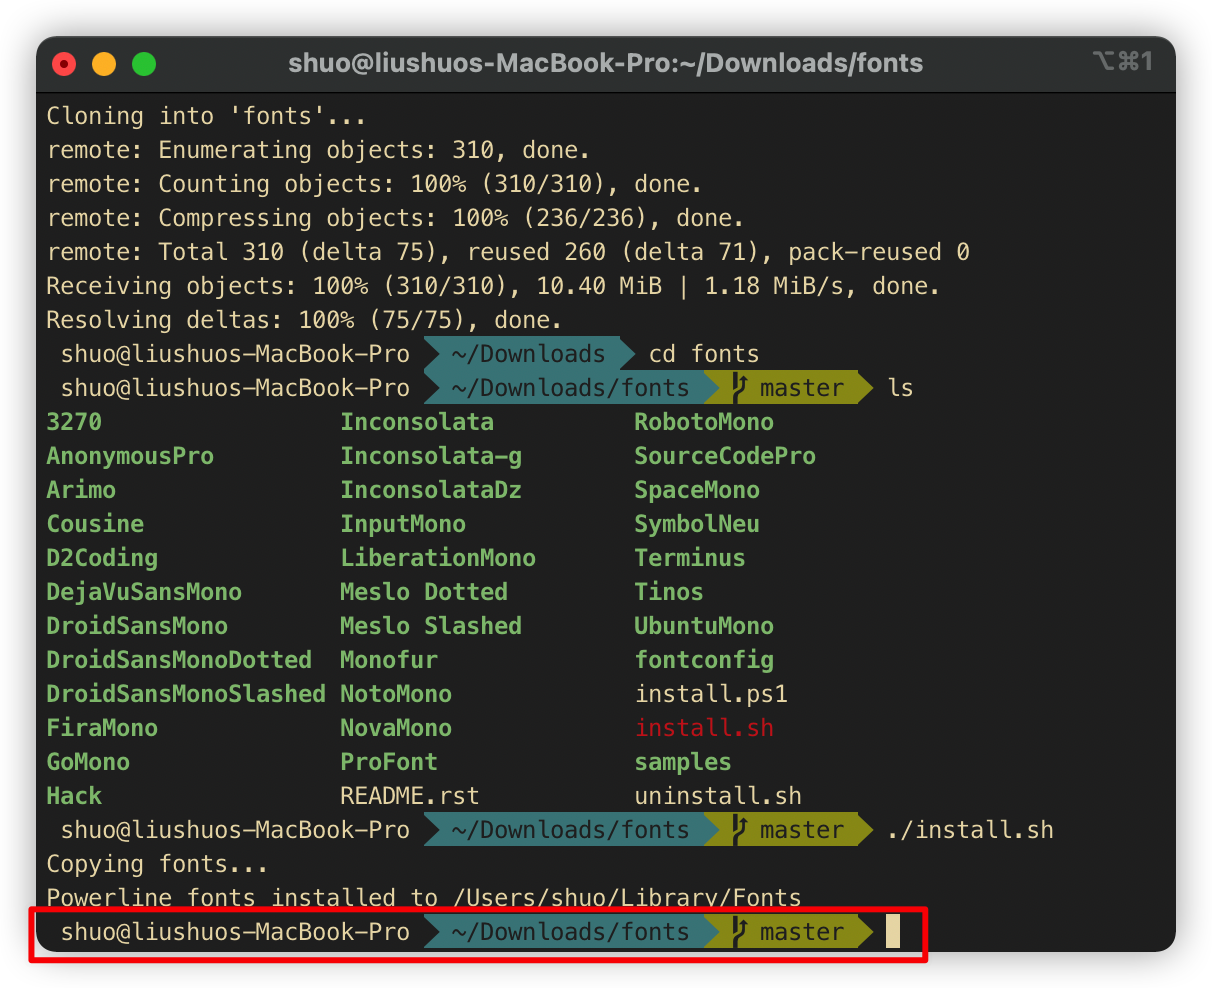
编辑主题的配置文件 ~/.oh-my-zsh/themes/agnoster.zsh-theme:
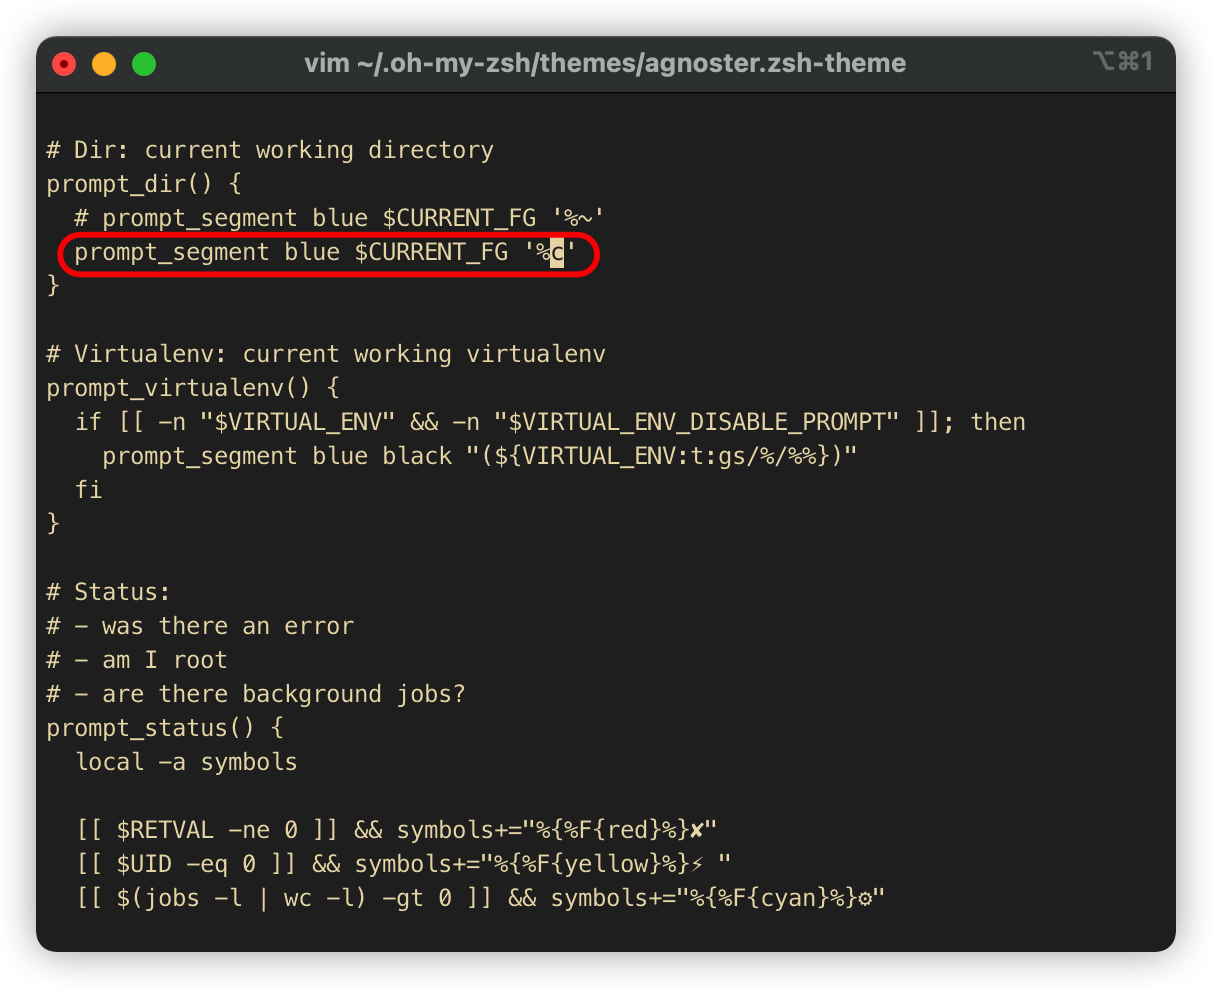
vim ~/.oh-my-zsh/themes/agnoster.zsh-theme将 prompt_dir 函数中的 prompt_segment blue $CURRENT_FG '%~' 修改为 prompt_segment blue $CURRENT_FG '%c’,这样只会显示最外层的路径:
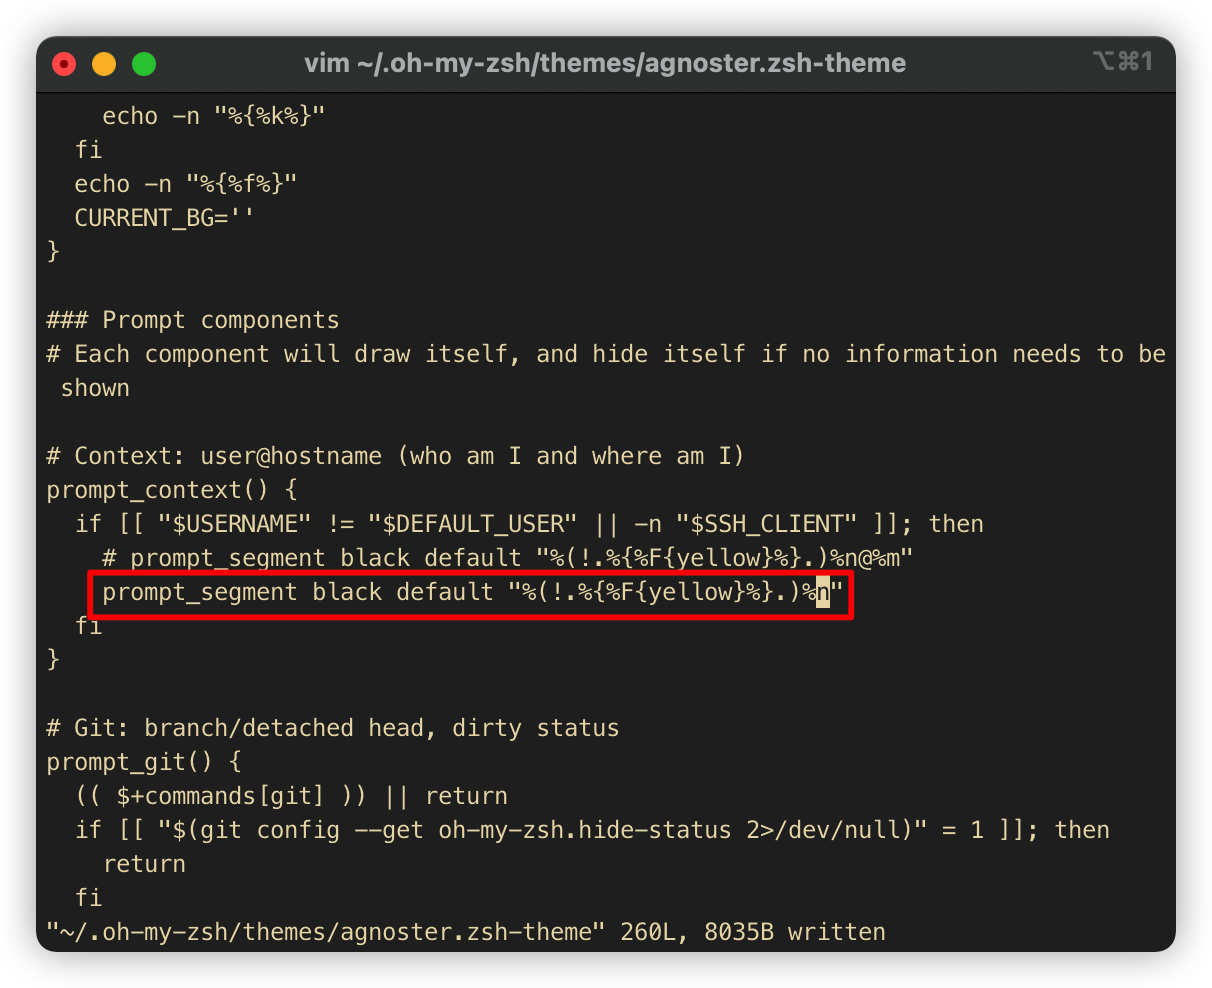
然后将 prompt_context 中的 prompt_segment black default "%(!.%{%F{yellow}%}.)%n@%m” 修改为 prompt_segment black default "%(!.%{%F{yellow}%}.)%n:
执行 .zshrc 生效配置:
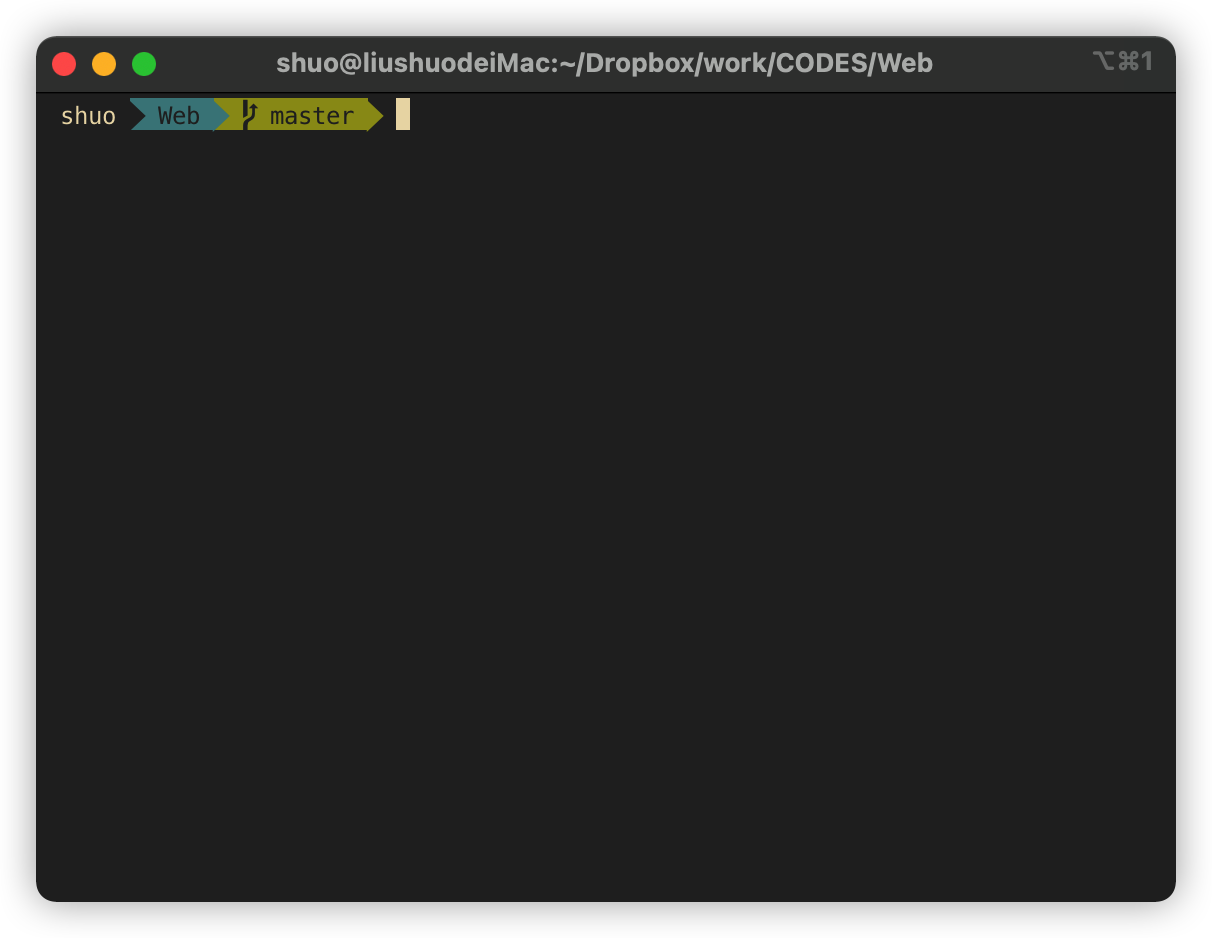
source .zshrc就配置完成了:
